The Math and Code Behind…
Facial alignment is a prereq…
4 years, 7 months ago
by Sabbir Ahmed

Often we have to provision EC2 instances as bastion hosts and then we run ansible playbooks or init scripts to install packages or configure the system. But if we run terraform and ansible in one go that would save time as we as reduce toil.
In this article, we are going to learn how to achieve this goal. We will set up a bastion host and install docker and docker-compose v2 automagically!
Clone the repository, and edit the files at
modules/ec2/variables.tfmodules/sshkey/variables.tf./variables.tfChange the variables with your VPC ID, Public Subnet, Private, and Public key. This process can also be automated if deploy from scratch or use an external terraform data resource.But that is out of the scope of this article. Now run the following commands:
terraform plan
This will show the provisioning plan and/or show if the infra code has any error.
Assuming the previous command executed successfully, let’s provision the infrastructure —
terraform apply --auto-approve
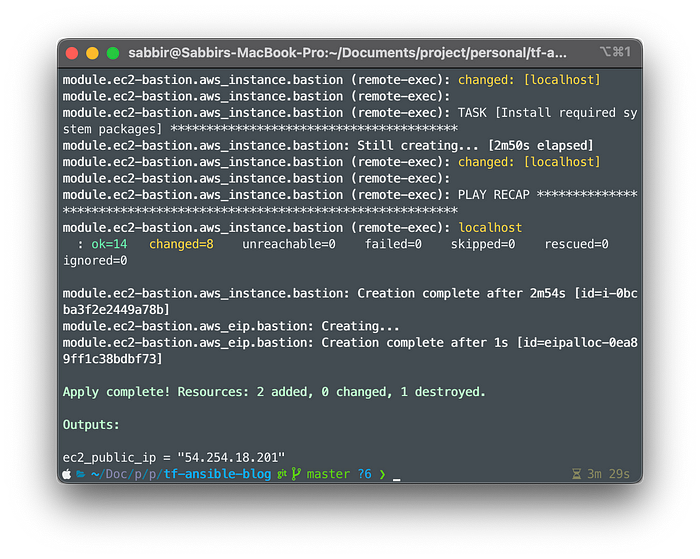
After successful completion, you’ll get something similar to this,

Awesome! Now you should be able to ssh into the server via the private key specified at modules/ec2/variables.tf
—
Project Structure
I decided to go with moduler or module-based approach for this project. This enables us to reuse our IaC. Also, you can start a terraform monorepo for all your infrastructure resources in production with this pattern.
.
├── ansible
├── modules
│   ├── ec2
│   └── sshkey
└── main.tf
ansible folder contains an installation script and the playbook. Our main focus is the modules folder. This holds all the resources for your infrastructure. We can use outputs of any resource to provision other resources, we can independently update/delete any component for the infrastructure from and within this folder. I just love this IaC structure.
Now, the rest is easy. Let’s dissect the following terraform code line 79–126 from modules/ec2/main.tf,
resource "aws_instance" "bastion" {
  ami               = data.aws_ami.ubuntu.id
  instance_type     = "t2.micro"
  key_name          = "blog-admin"
  security_groups   = [ aws_security_group.allow_tls_http_ssh.id ]
  subnet_id         = var.subnet_id

  tags = {
    Name = "bastion-blog-ec2"
    Terraform = "true"
    Environment = "test"
    Project = "Learning Terraform"
  }
  root_block_device {
    delete_on_termination = true
    volume_size = 8
    tags = {
      Name = "ebs-blog-bastion"
      Environment = "test"
      Terraform = "true"
      Project = "Learning Terraform"
    }
  }

  connection {
    type = "ssh"
    user        = "ubuntu"
    private_key = "${file(var.private_key_path)}"
    host = "${self.public_ip}"
  }

  provisioner "file" {
    source      = "./ansible/playbook.yaml"
    destination = "/home/ubuntu/playbook.yaml"
  }

  provisioner "file" {
    source      = "./ansible/install.sh"
    destination = "/home/ubuntu/install.sh"
  }

  provisioner "remote-exec" {
    inline = [
      "chmod +x /home/ubuntu/install.sh",
      "/home/ubuntu/install.sh",
    ]
  }
}
We declared the connection method for the EC2 as SSH, so we provided the block with a private key, personally, I would take ed25519 for the public key cryptography anyday and everyday. This will be used by the file and remote-exec provisioner. Let’s take a look at the ansible/install.sh file —
#!/bin/bash

sudo apt update && sleep 5;

sudo apt install -y ansible;
sleep 3;
echo "ansible installed"

echo "running playbook"
ansible-playbook -u ubuntu /home/ubuntu/playbook.yaml
This is a pretty simple script, we are updating the package cache of the newly created VM and then installing ansible. Finally, we run the ansible playbook. The ansible playbook contains the necessary steps to install docker and the compose plugin.
Note: I did not manage state and locking. If you use it for production please use remote state and locking mechanisms of your choice.
terraform destroy
That’s it! Improvements/ideas will be highly appreciated.
Happy Architecting…