Computer Vision
The Math and Code Behind…
Facial alignment is a prereq…
2 years, 10 months ago
by Sabbir Ahmed

Directory Structure
.
├── egcom                   # Helm Chart: full microservice stack
│   └── applications
│       ├── charts
│       └── templates
└── k8s-config              # Backing Services (Mongo ReplicaSet and RMQ)
│    ├── mongodb
│    └── rmq
├── kind-cluster.yaml       # Cluster config
└── metallb-conf.yaml       # BareMetal Load Balancer
The purpose of this demo is to simulate a simple e-commerce event-driven microservice architecture.
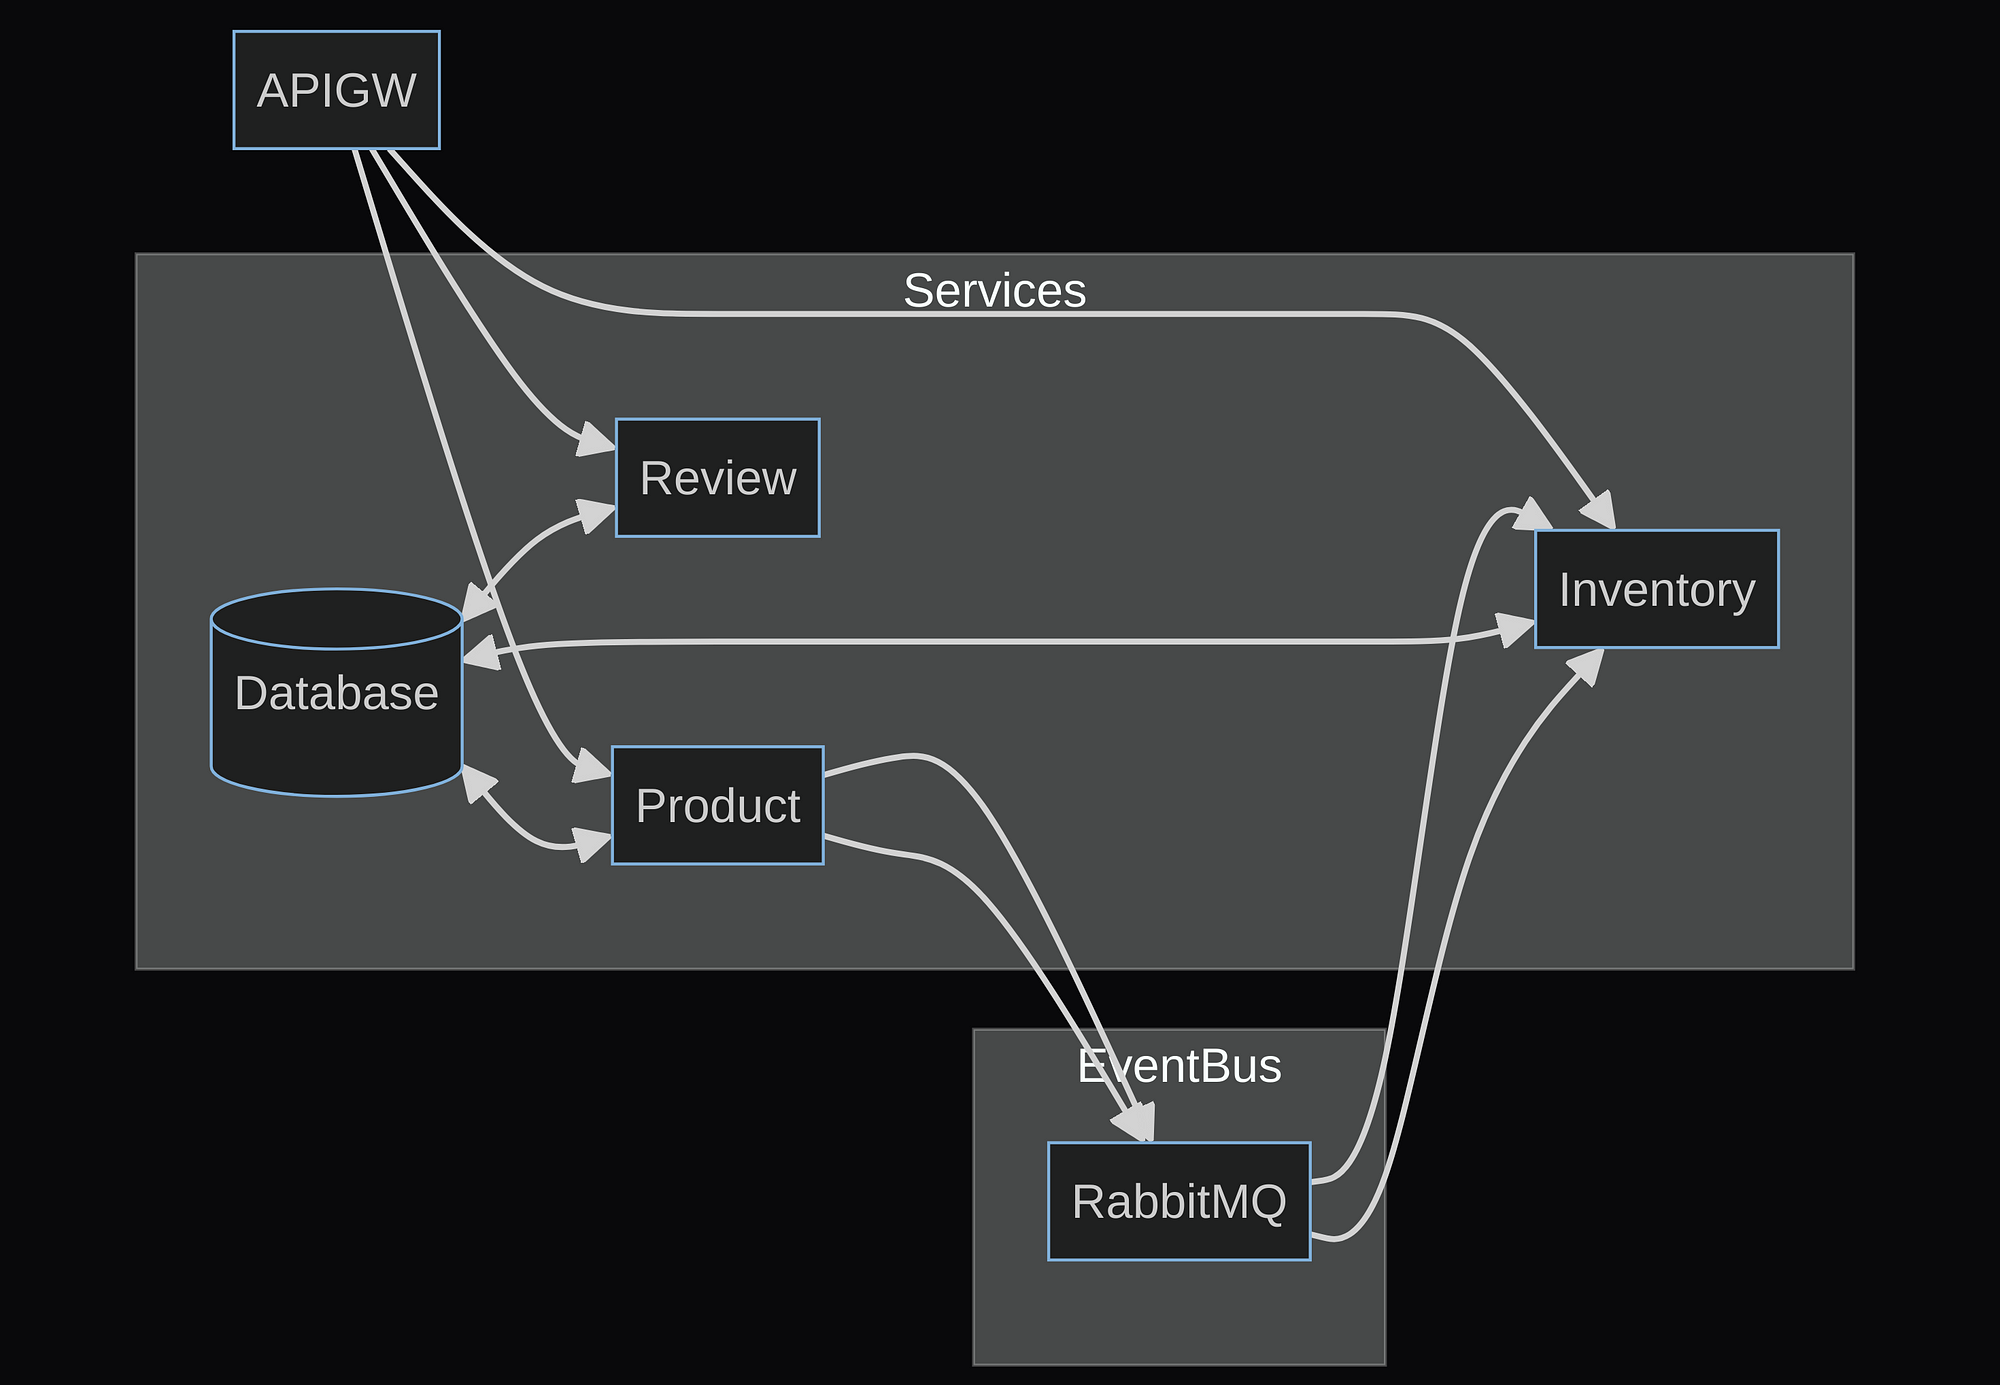
High-Level Diagram for the demo
If you don’t already have Kind installed, follow the link
kind create cluster --config=kind-cluster.yaml
This will create a kuberntes cluster with 1 control-plane and 2nodes
kubectl get crd gateways.gateway.networking.k8s.io &> /dev/null || \
  { kubectl kustomize "github.com/kubernetes-sigs/gateway-api/config/crd?ref=v0.8.0" | kubectl apply -f -; }
curl -L https://istio.io/downloadIstio | sh -
# export the istio path
istioctl install --set profile=demo -y
kubectl apply -f https://raw.githubusercontent.com/metallb/metallb/v0.13.7/config/manifests/metallb-native.yaml
docker network inspect -f '{{ (index .IPAM.Config 0).Gateway }}' kind
then configure metallb-conf.yaml accordingly and run k apply
kubectl apply -f "https://github.com/rabbitmq/cluster-operator/releases/latest/download/cluster-operator.yml"
Drop to RabbitMQ Pod shell and run
k exec -it rabbitmq-server-0 -- bash
rabbitmqctl add_user admin adminrabbitmqctl set_permissions --vhost / admin '.*' '.*' '.*'rabbitmqctl set_user_tags admin administrator
This will create an admin user Or get the default password from Cli
# Get Username
kubectl get secret rabbitmq-default-user -o jsonpath="{.data.username}" | base64 --decode
# Get Password
kubectl get secret rabbitmq-default-user -o jsonpath="{.data.password}" | base64 --decode
k apply -f -r k8s-config/mongod
k exec -it mongo-0 -- mongoshrs.initiate() var cfg = rs.conf()
cfg.members[0].host="mongo-0.mongo.default.svc.cluster.local:27017"
rs.reconfig(cfg)
rs.add("mongo-1.mongo.default.svc.cluster.local:27017")
rs.add("mongo-2.mongo.default.svc.cluster.local:27017")
rs.status()Update egcom/applications/templates/egcom-cm.yaml ConfigMap values with the MongoDB and RMQ creds.
k create ns egcom
k label namespace default istio-injection=enabledhelm install egcom ./applications -n egcom
~ ❯ k get gtw -n egcom
NAME                CLASS   ADDRESS        PROGRAMMED   AGE
apigw-gateway       istio   172.18.0.103   True         31h
inventory-gateway   istio   172.18.0.104   True         31h
product-gateway     istio   172.18.0.102   True         31h
review-gateway      istio   172.18.0.101   True         31h
baseURL is the address of the apigw-gateway.
Canary Deployment with Istio